Image Filters: How Sepia, Vintage, HDR, Noir and 13 More Effects Work
A technical and practical guide to photo filter algorithms — color matrix operations, tone curves, saturation adjustments, and artistic effects — with JavaScript and CSS code examples and guidance on when to use each filter.
ToolNest AI Team
Author
Published
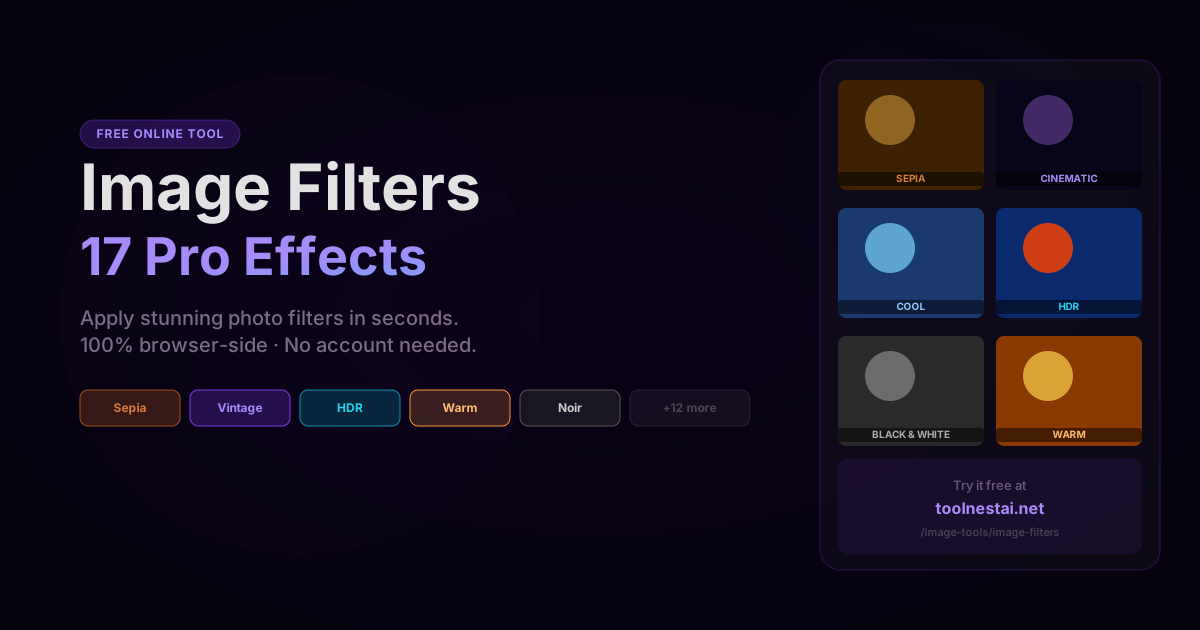
Every photo filter you've ever applied — the sepia tone on Instagram, the cinematic teal-and-orange grade in Hollywood films, the vintage fade of a Polaroid — is the result of a mathematical transformation applied to the pixel values of an image. Understanding these transformations lets you replicate any look programmatically, debug unexpected color shifts, and make informed choices when choosing a filter for your project.
Apply any of 17 professional photo filters instantly with the ToolNest AI Image Filters tool — real-time preview, no upload required.
How Image Filters Work at the Pixel Level
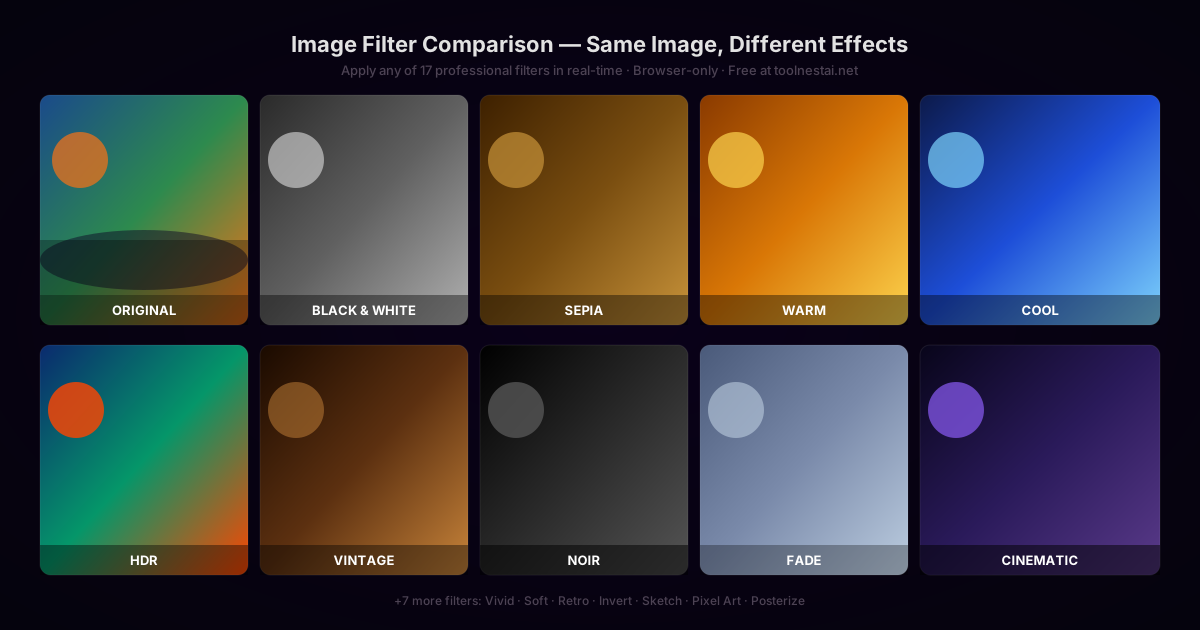
Every digital image is a grid of pixels. Each pixel stores four values: red, green, blue, and alpha (opacity), each typically in the range 0–255. An image filter is a function that takes these four values as input and produces new values as output.
The simplest filters are point operations — they transform each pixel independently, with no reference to neighboring pixels. More complex filters (like edge detection or blur) sample the neighborhood around each pixel. Most photo filters — sepia, warm, cool, vintage — are pure point operations, which makes them fast to compute and simple to implement.
The Color Matrix: Foundation of Most Filters
The most powerful tool in photo filter design is the color matrix — a 4×5 matrix that remaps every pixel's channels through a set of linear coefficients:
R' = a00×R + a01×G + a02×B + a03×A + a04
G' = a10×R + a11×G + a12×B + a13×A + a14
B' = a20×R + a21×G + a22×B + a23×A + a24
A' = a30×R + a31×G + a32×B + a33×A + a34
The identity matrix (no change) has 1s on the diagonal and 0s everywhere else. To create a filter, you adjust the coefficients to achieve the color transformation you want.
In SVG and CSS, you can apply a color matrix via feColorMatrix:
<filter id="sepia-filter">
  <feColorMatrix type="matrix"
    values="0.393 0.769 0.189 0 0
            0.349 0.686 0.168 0 0
            0.272 0.534 0.131 0 0
            0     0     0     1 0"/>
</filter>
In CSS:
img { filter: sepia(1); }      /* 100% sepia */
img { filter: saturate(2); }   /* 200% saturation = HDR-style boost */
img { filter: hue-rotate(30deg) saturate(1.5); } /* Warm shift */
Filter Types and Their Algorithms

Color Temperature Filters (Warm, Cool)
Color temperature filters work by biasing the RGB channels in opposite directions. A warm filter boosts reds and yellows while reducing blues. A cool filter boosts blues and cyans while reducing reds.
Warm filter implementation:
function applyWarm(r, g, b) {
  return [
    Math.min(255, r * 1.20),  // +20% red
    Math.min(255, g * 1.05),  // +5% green
    Math.min(255, b * 0.82),  // -18% blue
  ];
}
Cool filter implementation:
function applyCool(r, g, b) {
  return [
    Math.min(255, r * 0.82),  // -18% red
    Math.min(255, g * 1.05),  // +5% green
    Math.min(255, b * 1.20),  // +20% blue
  ];
}
These simple multipliers produce a convincing color temperature shift. The key insight is that warm and cool are inverse operations — the warm filter's red multiplier is the cool filter's blue multiplier.
Sepia
Sepia is a specific color matrix that converts any color image to a warm brownish tone, mimicking antique photographs developed with silver selenide or sodium thiosulfate.
function applySepia(r, g, b) {
  return [
    Math.min(255, r * 0.393 + g * 0.769 + b * 0.189),
    Math.min(255, r * 0.349 + g * 0.686 + b * 0.168),
    Math.min(255, r * 0.272 + g * 0.534 + b * 0.131),
  ];
}
The matrix was derived to match the characteristic brownish-yellow tone of actual sepia-toned prints. The key feature: all three output channels use the same input, weighted differently, so the image is effectively desaturated and then tinted with a warm brown.
For a partial sepia effect (e.g., 60% strength), blend between the original and full-sepia output:
function applySepiaStrength(r, g, b, strength) {
  const [sr, sg, sb] = applySepia(r, g, b);
  return [
    r + (sr - r) * strength,
    g + (sg - g) * strength,
    b + (sb - b) * strength,
  ];
}
Vintage and Fade
Vintage filters combine several operations to produce a "faded" film look:
- Desaturation — reduce color intensity
- Warm color bias — shift toward yellow-orange
- Lifted black point — raise the minimum output value so pure black maps to a dark gray (~20–40)
- Reduced white point — cap maximum output below 255
The lifted black point is the signature of vintage film photography. Real film has a base fog level — it cannot reproduce perfect black. Raising the minimum from 0 to ~25 immediately gives an image that "film" look.
function applyVintage(r, g, b) {
  // Desaturate 30%
  const lum = 0.2126 * r + 0.7152 * g + 0.0722 * b;
  r = r * 0.7 + lum * 0.3;
  g = g * 0.7 + lum * 0.3;
  b = b * 0.7 + lum * 0.3;

  // Warm bias
  r = Math.min(255, r * 1.1);
  b = Math.min(255, b * 0.85);

  // Lift blacks
  const lift = 25;
  const scale = (255 - lift) / 255;
  return [
    lift + r * scale,
    lift + g * scale * 0.95,  // slightly cooler blacks
    lift + b * scale * 0.85,
  ];
}
HDR (High Dynamic Range Appearance)
"HDR" as a photo filter is not true high dynamic range imaging — it is a visual style that mimics HDR output by dramatically boosting saturation and local contrast, creating an over-processed but striking effect.
The algorithm converts to HSL, boosts saturation, then converts back:
function applyHDR(r, g, b) {
  // Boost saturation via HSL
  const [h, s, l] = rgbToHsl(r, g, b);
  const boostedS = Math.min(1, s * 2.5);  // 250% saturation

  // Boost contrast
  const [r2, g2, b2] = hslToRgb(h, boostedS, l);
  return [
    applyContrast(r2, 1.4),  // 40% contrast boost
    applyContrast(g2, 1.4),
    applyContrast(b2, 1.4),
  ];
}

function applyContrast(value, factor) {
  return Math.max(0, Math.min(255, (value - 128) * factor + 128));
}
Noir
Noir converts to grayscale and then significantly boosts contrast to produce a hard, dramatic black-and-white look:
function applyNoir(r, g, b) {
  // BT.709 grayscale
  const gray = 0.2126 * r + 0.7152 * g + 0.0722 * b;
  // High contrast via S-curve or simple scaling
  const contrast = (gray - 128) * 2.2 + 128;
  const value = Math.max(0, Math.min(255, contrast));
  return [value, value, value];
}
The 2.2 contrast multiplier is aggressive — it pushes mid-tones toward the extremes, creating the deep shadows and bright highlights characteristic of noir cinema and photography.
Cinematic (Teal and Orange)
The most recognizable color grade in modern Hollywood cinema is teal-and-orange — a complementary color pair that appears in countless blockbusters. Skin tones naturally fall in the orange range, so they remain vivid while the shadows and cooler areas shift to teal.
function applyCinematic(r, g, b) {
  // Lift shadows to teal
  const lift = 15;
  r = r + (r < 128 ? -lift : lift * 0.3);  // reduce red in shadows
  g = g + (g < 128 ? lift * 0.5 : 0);       // add green in shadows (teal)
  b = b + (b < 128 ? lift : -lift * 0.3);   // add blue in shadows (teal)

  // Boost orange range
  if (r > g && r > b) {
    r = Math.min(255, r * 1.1);  // warm up highlights
  }

  // Slight desaturation
  const lum = 0.2126 * r + 0.7152 * g + 0.0722 * b;
  return [
    Math.max(0, Math.min(255, r * 0.85 + lum * 0.15)),
    Math.max(0, Math.min(255, g * 0.85 + lum * 0.15)),
    Math.max(0, Math.min(255, b * 0.85 + lum * 0.15)),
  ];
}
Artistic Filters: Sketch, Pixel Art, Posterize
Sketch extracts edges using a convolution kernel. The Laplacian operator highlights areas where pixel values change rapidly (edges):
const laplacianKernel = [
  [0, -1,  0],
  [-1, 4, -1],
  [0, -1,  0],
];
After applying the Laplacian, the result is inverted (dark edges on white background) to produce a sketch effect.
Pixel Art downscales the image to a small size (e.g., 64×64) using nearest-neighbor interpolation, then scales it back up. This creates visible pixel blocks:
function applyPixelArt(canvas, blockSize = 16) {
  const ctx = canvas.getContext('2d');
  const w = canvas.width;
  const h = canvas.height;
  // Scale down
  ctx.drawImage(canvas, 0, 0, Math.round(w / blockSize), Math.round(h / blockSize));
  // Scale back up with nearest-neighbor
  ctx.imageSmoothingEnabled = false;
  ctx.drawImage(canvas, 0, 0, Math.round(w / blockSize), Math.round(h / blockSize), 0, 0, w, h);
}
Posterize reduces the number of distinct colors by quantizing each channel to a fixed number of levels:
function posterize(value, levels) {
  const step = 255 / (levels - 1);
  return Math.round(Math.round(value / step) * step);
}
At 4 levels, each channel can only take values approximately 0, 85, 170, 255 — producing the flat, poster-like appearance.
Implementing a Full Filter System in JavaScript
Here is a minimal working implementation of a browser-side filter system:
class ImageFilter {
  constructor(canvas) {
    this.canvas = canvas;
    this.ctx = canvas.getContext('2d');
  }

  applyFilter(name, strength = 1.0) {
    const imageData = this.ctx.getImageData(0, 0, this.canvas.width, this.canvas.height);
    const data = imageData.data;

    for (let i = 0; i < data.length; i += 4) {
      let r = data[i], g = data[i + 1], b = data[i + 2];
      let out;

      switch (name) {
        case 'sepia':     out = this.sepia(r, g, b); break;
        case 'warm':      out = this.warm(r, g, b);  break;
        case 'cool':      out = this.cool(r, g, b);  break;
        case 'grayscale': out = this.grayscale(r, g, b); break;
        default: out = [r, g, b];
      }

      // Blend original with filter output by strength
      data[i]     = r + (out[0] - r) * strength;
      data[i + 1] = g + (out[1] - g) * strength;
      data[i + 2] = b + (out[2] - b) * strength;
    }

    this.ctx.putImageData(imageData, 0, 0);
  }

  sepia(r, g, b) {
    return [
      Math.min(255, r * 0.393 + g * 0.769 + b * 0.189),
      Math.min(255, r * 0.349 + g * 0.686 + b * 0.168),
      Math.min(255, r * 0.272 + g * 0.534 + b * 0.131),
    ];
  }

  warm(r, g, b) {
    return [Math.min(255, r * 1.20), Math.min(255, g * 1.05), Math.min(255, b * 0.82)];
  }

  cool(r, g, b) {
    return [Math.min(255, r * 0.82), Math.min(255, g * 1.05), Math.min(255, b * 1.20)];
  }

  grayscale(r, g, b) {
    const v = 0.2126 * r + 0.7152 * g + 0.0722 * b;
    return [v, v, v];
  }
}
CSS vs. Canvas Filters: When to Use Each
| Approach | Pros | Cons |
|---|---|---|
CSS filter: | Instant, GPU-accelerated, no JS needed | Limited to W3C filter primitives, no pixel-level control |
SVG feColorMatrix | Precise 4×5 matrix, reusable | More verbose, no per-pixel custom logic |
Canvas getImageData | Full pixel control, any algorithm | Slower for large images, blocks main thread |
| WebGL shader | Massively parallel, real-time at 4K | Complex setup, GLSL knowledge required |
For simple filters (brightness, contrast, sepia, warm, cool, grayscale), CSS filter: is the best choice — the browser GPU handles it with zero JavaScript. For artistic or custom filters that CSS cannot express, the Canvas API is the standard approach.
Frequently Asked Questions
How do image filters work technically?
Most photo filters are point operations — a mathematical function applied to each pixel's R, G, B values independently. The function can be a color matrix (linear transformation), a tone curve (non-linear lookup table), a saturation adjustment (HSL manipulation), or a combination of all three.
What is the difference between a warm filter and adjusting color temperature in a photo editor?
A warm filter in a browser-based tool is typically a simple RGB channel bias — multiply red up, multiply blue down. A proper color temperature adjustment in professional software uses a white balance algorithm that accounts for the color temperature of the scene's illuminant, which is physically more accurate but also more complex. For most purposes, the channel-bias approach produces a satisfying result.
Does applying a filter reduce image quality?
For pixel-based operations (sepia, warm, grayscale, etc.), the filter is applied to the image data and then the result is exported. If you export as PNG, quality is lossless. If you export as JPEG, compression introduces a generation loss. The filter operation itself is a mathematical transformation — it changes pixel values but does not add noise or artifacts beyond what the export codec introduces.
Can I stack multiple filters?
Yes. Filters are just functions — you apply the output of one as the input of the next. Stacking must be done carefully: applying a warm filter after sepia will push the sepia tone further toward orange, which may or may not be what you want. The order matters because color transformations are generally not commutative.
What is the cinematic teal-and-orange look?
It is a complementary color grade where the shadows shift to teal (blue-green) and the mid-tones/highlights shift to orange. Because human skin tones fall in the orange range of the color wheel, they remain warm and vivid while the environment takes on a cool teal cast. This contrast makes subjects stand out from backgrounds and is the dominant color grade in action and blockbuster cinema from 2005 onward.
How does the Noir filter differ from grayscale?
A basic grayscale conversion maps each pixel to a neutral gray based on luminance. Noir adds aggressive contrast on top — it pushes the grays toward black and white extremes, eliminating mid-tones and creating the high-contrast, dramatic appearance associated with film noir photography and cinema.
Does processing happen on the server?
No. The ToolNest AI Image Filters tool processes everything in your browser using the Canvas 2D API. Your images never leave your device. The tool reads pixel data from the image, applies the transformation, and writes the result back — entirely client-side.
About the author
ToolNest AI Team
The ToolNest AI team builds free tools that help developers, marketers, and creators do more online — faster.
Related Articles
Brightness and Contrast: How Linear Shift, Contrast Stretch, and Gamma Work
A precise technical breakdown of brightness (linear shift), contrast (center stretch), gamma (power curve), and levels — with formulas, code examples in JavaScript and Python, histogram reading, and how to choose the right adjustment for your image.

Grayscale Conversion: Average, BT.601, BT.709, and Luminance Explained
A technical deep-dive into every grayscale conversion method — simple average, BT.601 luma, BT.709 luminance, HSL lightness, and channel extraction — with formulas, JavaScript and Python code, and guidance on when to use each.
Image Sharpen: Unsharp Mask, Laplacian, and High-Pass Filter Explained
A technical guide to image sharpening — how unsharp mask works, the Laplacian kernel, high-pass filter method, correct parameter values, and how to avoid over-sharpening halos. With JavaScript, Python, and Sharp code examples.