Image Resizer: Resize Without Distortion — Free Online Tool
Learn the aspect ratio math behind distortion-free resizing, why downscaling is always safe but upscaling loses quality, and the interpolation algorithms behind image resizing. Free, instant, private tool.
ToolNest AI Team
Author
Published
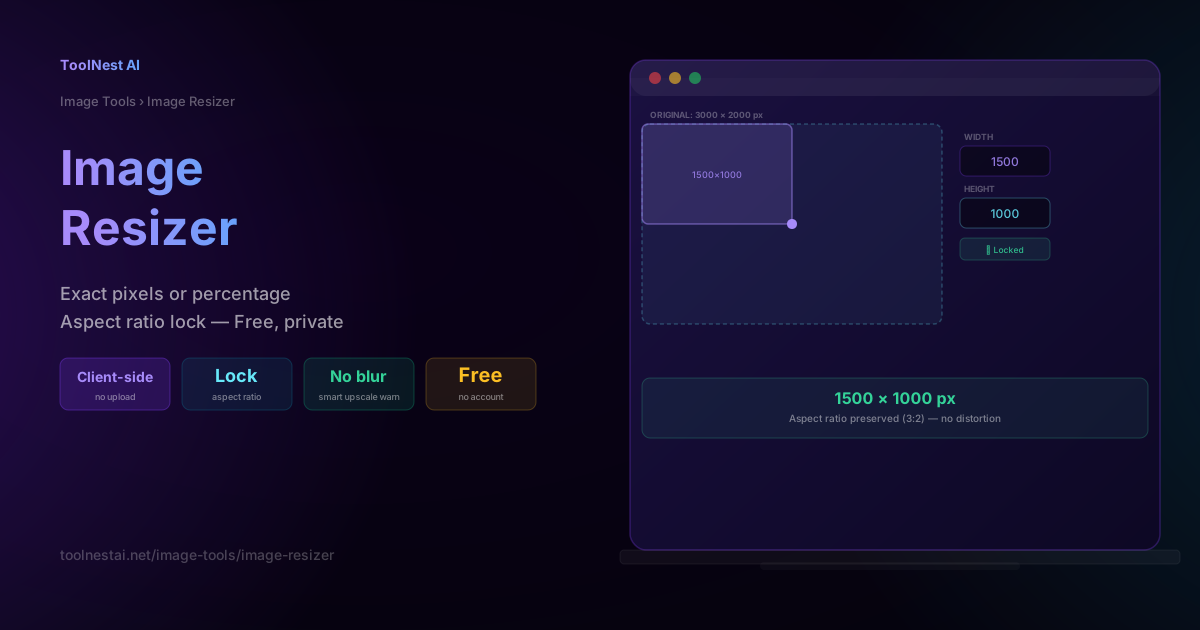
Resizing an image sounds like the simplest possible operation — until you type in a new width and height by hand and end up with a visibly squashed photo, or upscale a small thumbnail expecting it to become sharp and get a blurry mess instead. This guide covers the actual math behind distortion-free resizing and why downscaling and upscaling are fundamentally different operations in terms of quality.
Resize any image instantly, entirely in your browser, with the ToolNest AI Image Resizer.
The Aspect Ratio Formula
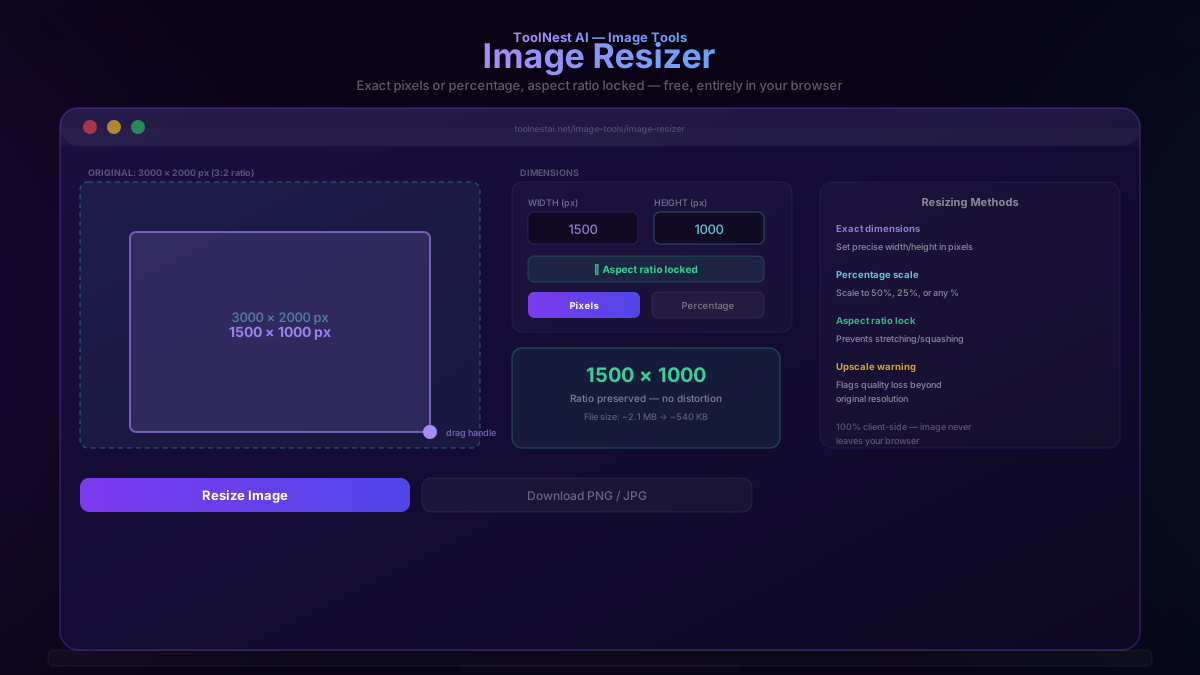
An image's aspect ratio is the proportional relationship between its width and height. To resize an image without distorting it, the new height must be calculated from the new width using the same ratio as the original:
new_height = original_height × (new_width ÷ original_width)
Example: an image originally 3000×2000 pixels (a 3:2 ratio) resized to a width of 1500 pixels:
2000 × (1500 ÷ 3000) = 1000
The correct height is 1000 pixels, giving a final size of 1500×1000 — exactly half the original in each dimension, preserving the 3:2 ratio perfectly.
Why Locking the Aspect Ratio Matters
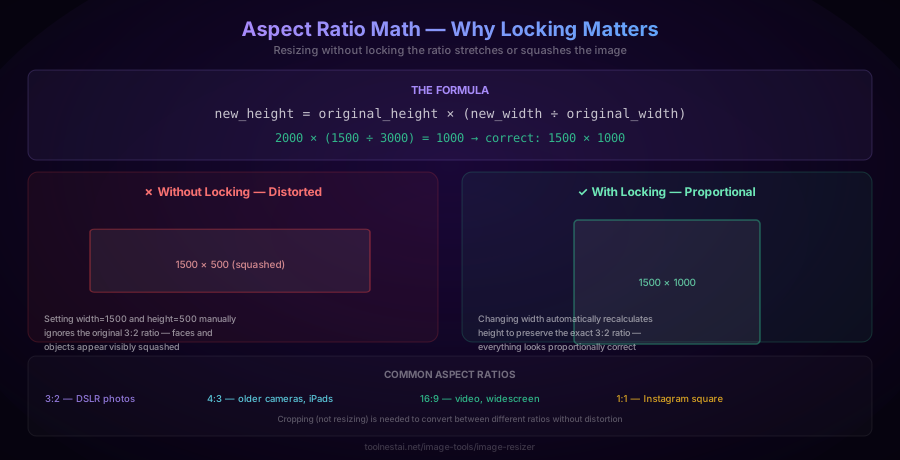
If you manually type in both a new width and a new height without regard for the original ratio, you get visible distortion — faces, logos, and straight lines all appear stretched horizontally or vertically depending on which dimension was changed more aggressively.
Locking the aspect ratio means that changing one dimension (say, width) automatically recalculates the other (height) using the formula above, so the image is always scaled proportionally — never stretched or squashed. This is the default and recommended mode for the vast majority of resizing tasks.
When would you deliberately want to change the aspect ratio? Only when you specifically intend to crop or reframe the image — for example, converting a landscape photo into a square Instagram post requires selecting which portion of the image to keep, not simply forcing the dimensions to change (that's cropping, a different operation from resizing).
Common aspect ratios: 3:2 (typical DSLR photos), 4:3 (older cameras, tablets), 16:9 (video and widescreen displays), and 1:1 (square, common for social media profile pictures and Instagram posts).
Downscaling vs Upscaling — Why One Loses More Quality
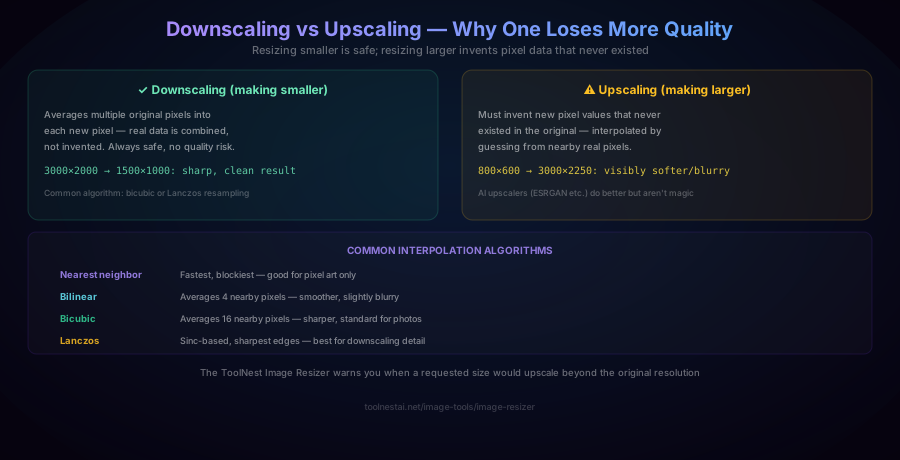
Downscaling (making an image smaller) is always safe. The resizing algorithm averages multiple original pixels together into each new, smaller pixel. Since real pixel data is being combined — not invented — downscaling never introduces blur or artifacts beyond what naturally comes from having fewer pixels overall. A 3000×2000 photo resized down to 1500×1000 remains sharp and clean.
Upscaling (making an image larger) always loses quality relative to a genuinely higher-resolution original. Because the new, larger image needs more pixels than the source data actually contains, the algorithm must invent new pixel values by interpolating from nearby real pixels — essentially educated guessing. The result is always visibly softer than a true high-resolution image would be; upscaling can never recover detail that was never captured in the first place.
Common interpolation algorithms, from fastest/lowest-quality to slowest/highest-quality:
- Nearest neighbor: the fastest method, simply copies the nearest existing pixel — produces blocky results, useful primarily for intentionally preserving hard pixel edges (like pixel art).
- Bilinear: averages the 4 nearest pixels — smoother than nearest neighbor but can look slightly blurry.
- Bicubic: averages 16 nearby pixels using a more sophisticated curve — the standard choice for photographs, balancing sharpness and smoothness.
- Lanczos: a sinc-function-based algorithm that produces the sharpest results, particularly effective for downscaling with strong detail preservation.
AI-based upscalers (like ESRGAN and similar neural network models) can produce noticeably better upscaling results than traditional interpolation by learning to hallucinate plausible detail — but they are still generating new information that wasn't in the original, not recovering lost data, and results can occasionally introduce unrealistic artifacts.
How to Use the Image Resizer
The ToolNest AI Image Resizer processes your image entirely in your browser — nothing is uploaded to a server.
- Upload your image
- Choose pixels or percentage mode — enter an exact target width/height, or scale to a percentage of the original size
- Keep "lock aspect ratio" enabled (the default) unless you specifically intend to distort the image
- Watch for the upscale warning — the tool flags when your requested size exceeds the original resolution, since the result will be softer, not sharper
- Download the resized image in your chosen format
Resizing in Different Languages
JavaScript (Canvas API):
function resizeImage(img, newWidth) {
  const ratio = newWidth / img.width;
  const newHeight = img.height * ratio;
  const canvas = document.createElement('canvas');
  canvas.width = newWidth;
  canvas.height = newHeight;
  canvas.getContext('2d').drawImage(img, 0, 0, newWidth, newHeight);
  return canvas;
}
Python (Pillow):
from PIL import Image

img = Image.open('photo.jpg')
ratio = 1500 / img.width
new_size = (1500, int(img.height * ratio))
resized = img.resize(new_size, Image.LANCZOS)
resized.save('resized.jpg')
Command line (ImageMagick):
convert input.jpg -resize 1500x output.jpg
# The trailing 'x' with no height lets ImageMagick preserve aspect ratio automatically
Common Mistakes
Mistake 1: Manually setting both width and height without locking aspect ratio. This is the single most common resizing mistake, producing visibly stretched or squashed images. Always keep aspect ratio locked unless you deliberately want to distort the image.
Mistake 2: Upscaling and expecting sharp results. Upscaling can never add detail that wasn't in the original — the output will always be softer than a genuinely high-resolution source. If you need more apparent detail, consider an AI upscaling tool, but understand it's generating plausible new pixels, not recovering lost information.
Mistake 3: Resizing to arbitrary dimensions that don't match a target platform's requirements. Check the exact dimensions required (e.g., a specific social media platform's recommended image size) before resizing, rather than guessing.
Mistake 4: Not considering file size alongside pixel dimensions. Resizing down in pixel dimensions usually (but not always) reduces file size — always verify the final file size meets any upload limits you're working with, especially for very high-resolution originals.
Frequently Asked Questions
How do I resize an image without distorting it?
Keep the aspect ratio locked so that changing one dimension (width or height) automatically recalculates the other using the formula new_height = original_height × (new_width ÷ original_width). This ensures the image scales proportionally in both directions, avoiding the stretched or squashed appearance that results from manually setting both dimensions independently.
Why does upscaling an image make it blurry?
Upscaling requires generating new pixel values that didn't exist in the original image, since there are more pixels in the larger output than the source data actually contains. These new pixels are estimated (interpolated) from nearby real pixels rather than being true additional detail, which produces a visibly softer result than a genuinely high-resolution image would have. This is fundamentally different from downscaling, which only combines existing real pixel data and never needs to invent anything.
What is the difference between bilinear and bicubic resizing?
Both are interpolation algorithms used when resizing images. Bilinear averages the 4 nearest pixels to calculate each new pixel value, producing a reasonably smooth but sometimes slightly blurry result. Bicubic averages 16 nearby pixels using a more sophisticated mathematical curve, generally producing sharper, higher-quality results — bicubic is the standard choice for resizing photographs.
Is it safe to resize an image down in size multiple times?
Yes, downscaling is always safe from a quality perspective, since it only combines real existing pixel data rather than inventing new information. However, repeatedly resizing (down and back up, or through multiple intermediate sizes) can introduce cumulative quality loss from repeated interpolation and, if saved as JPEG at each step, repeated lossy compression. Where possible, resize directly from the original to your final target size in one step.
What aspect ratio should I use for social media?
Common targets include 1:1 (square, works well across Instagram feed posts), 4:5 (portrait, often maximizes vertical space in Instagram/Facebook feeds), 16:9 (landscape/widescreen, standard for YouTube thumbnails and video), and 9:16 (vertical, standard for Stories and Reels/TikTok). Check the specific platform's current recommended dimensions, as these guidelines occasionally change.
Can I resize an image to a specific file size rather than pixel dimensions?
Not directly through resizing alone — pixel dimensions and file size are related but not identical (file size also depends on compression settings and image complexity). To hit a specific file size target, you typically need to combine resizing (reducing pixel dimensions) with compression (adjusting JPEG quality or using a more efficient format), iterating as needed. The ToolNest AI Image Compressor is the more direct tool for targeting a specific file size.
Does resizing an image change its format?
Not by default — resizing changes only the pixel dimensions, not the file format. However, most resizing tools let you also choose an output format during download (e.g., converting from PNG to JPEG), which is a separate operation from the resize itself, often combined in the same tool for convenience.
Why does my resized image look different in file size than expected?
File size depends on more than just pixel count — image complexity (how much detail and color variation exists), the compression format used (JPEG, PNG, WebP), and the compression quality setting all affect the final file size independently of the pixel dimensions. A smaller image with lots of fine detail can sometimes be a larger file than a bigger image with simple, uniform colors.
About the author
ToolNest AI Team
The ToolNest AI team builds free tools that help developers, marketers, and creators do more online — faster.
Related Articles
Word Counter: Count Words, Characters & Reading Time Free
Learn how to use a word counter to track words, characters, sentences, paragraphs and reading time — plus a complete reference of character limits for every major platform.
Case Converter: UPPERCASE, camelCase, snake_case & More — Free Tool
Learn every text case format — UPPERCASE, Title Case, camelCase, snake_case, kebab-case, and more — when to use each for writing and code, and the real rules behind proper Title Case. Free, instant tool.