Image Compressor: Reduce Image File Size Without Losing Quality
Learn how image compression works, which format to choose for every use case, and how to reduce image file size by up to 90% free — with a live before/after preview and batch download.
ToolNest AI Team
Author
Published
You have a beautiful hero image. It looks perfect in your design software. Then you upload it to your website and your page speed score drops to 42. Google marks your Largest Contentful Paint as "Poor." Mobile visitors wait six seconds for the image to load — and most of them leave.
The fix is not a better CDN or a faster server. The fix is image compression.
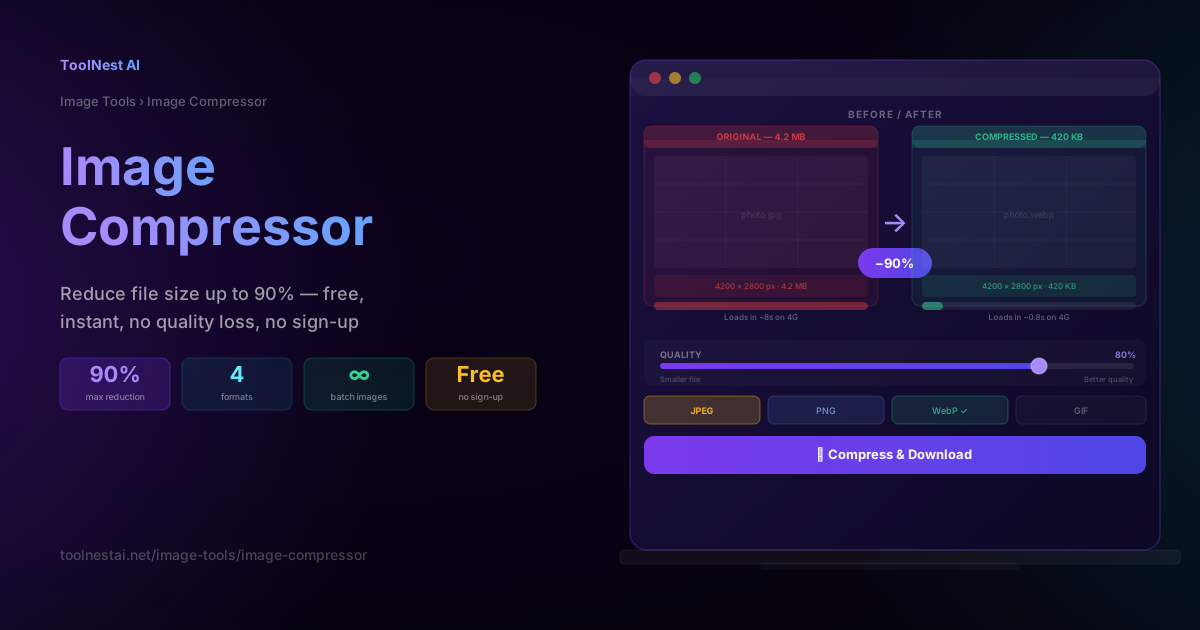
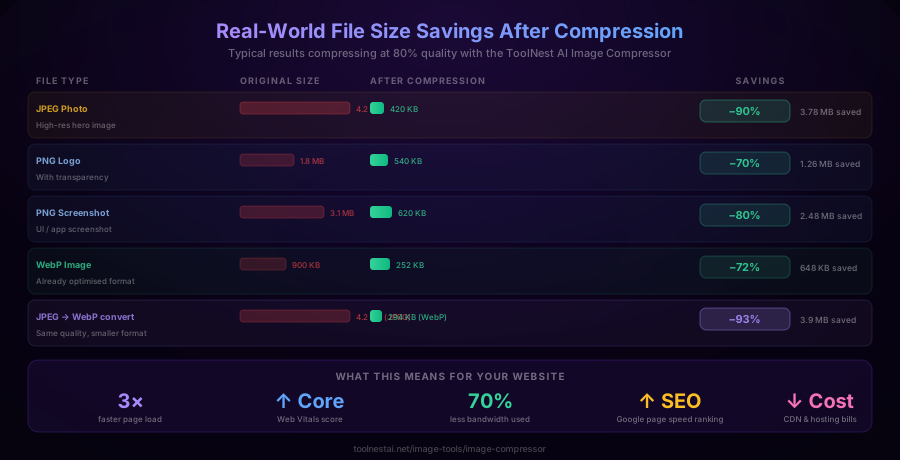
A 4.2 MB photograph can become a 420 KB WebP image that looks identical on screen. That single change can cut your page load time in half, improve your Core Web Vitals score, and reduce your CDN bandwidth bill — all without touching your design.
This guide explains how image compression works, which format to use for every type of image, the most common mistakes people make, and how to compress any image for free in under a minute.
What Is Image Compression?
Image compression reduces the file size of an image by removing or approximating data that the human eye cannot easily perceive at normal viewing distances.
There are two types:
Lossy compression permanently removes some image data to achieve much smaller file sizes. JPEG and WebP in lossy mode use this approach. At a quality setting of 75–85%, the result is visually indistinguishable from the original on a screen — but the file can be 60–90% smaller. The trade-off is that compressing a lossy image multiple times degrades quality with each pass.
Lossless compression reorganises and encodes data more efficiently without discarding any of it. PNG uses lossless compression, as does WebP in lossless mode. The result is a perfect pixel-for-pixel copy of the original — at a somewhat smaller file size than uncompressed formats, but larger than lossy equivalents.
For web use, lossy compression at 75–85% quality is almost always the right choice for photographs and hero images. Lossless is better for logos, icons, and screenshots where sharp edges and exact colours matter.
Why Image File Size Matters for Your Website
Images are the single largest contributor to page weight on most websites. Studies consistently show that images account for 50–75% of the total bytes transferred when loading a typical web page.
That matters for several concrete reasons.
Page load speed. A 4 MB image takes roughly 8 seconds to load on a 4G mobile connection. The compressed 420 KB equivalent loads in under a second. Most users abandon a page that takes more than 3 seconds.
Core Web Vitals. Google's page experience ranking signals include Largest Contentful Paint (LCP), which measures how quickly the main image or content block loads. A large, uncompressed hero image is the most common cause of a poor LCP score. Compress it and your LCP often improves by a full second or more.
Search rankings. Google has confirmed that page speed is a ranking factor. Slow pages rank lower. Pages with compressed images rank higher, all else being equal.
Bandwidth and hosting costs. Every byte your server sends costs money — in hosting bills, CDN transfer fees, and on mobile plans for your visitors. A 70% reduction in image size is a 70% reduction in those costs at scale.
User experience on mobile. Mobile devices have slower connections, smaller caches, and less processing power than desktops. An unoptimised image that loads fine on a laptop can make a mobile page feel broken.
Choosing the Right Image Format
Format choice is as important as compression level. Using the wrong format can make images larger than necessary or introduce quality problems that compression cannot fix.
JPEG — Best for Photographs
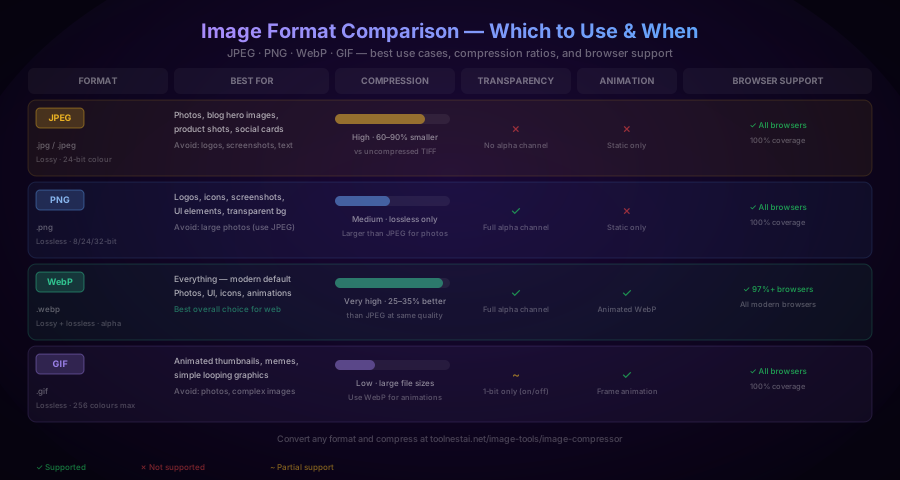
JPEG (.jpg) is the standard format for photographs and complex images with continuous colour gradients. It uses lossy compression and supports 24-bit colour (16.7 million colours).
Use JPEG for: blog hero images, product photos, background images, social sharing cards, any photograph.
Avoid JPEG for: logos, icons, screenshots, images with text, anything that needs transparency.
At 80% quality, a JPEG photo is typically 60–80% smaller than the original uncompressed version and looks identical on screen. Quality below 60% starts showing visible compression artefacts — blocky patterns, colour banding, and blurred edges.
PNG — Best for Logos and Transparent Images
PNG (.png) uses lossless compression and supports full alpha channel transparency. It is perfect for images that need sharp, pixel-accurate edges — logos, icons, UI screenshots, and anything with a transparent background.
Use PNG for: logos, icons, product images with transparent backgrounds, UI screenshots, graphics with text.
Avoid PNG for: photographs and large hero images. A PNG version of a photograph is typically 2–5× larger than the equivalent JPEG — with no visible quality improvement.
PNG compression can still reduce file size by 20–40% compared to uncompressed PNG through lossless optimisation.
WebP — Best for Almost Everything on Modern Sites
WebP is a modern image format developed by Google that supports both lossy and lossless compression, full alpha channel transparency, and animation. It produces files 25–35% smaller than equivalent JPEG at the same visual quality level.
Use WebP for: everything on a modern website. Hero images, product photos, blog thumbnails, icons with transparency, animated images.
Browser support is 97%+ — all modern browsers including Chrome, Firefox, Safari (since version 14), and Edge support WebP natively. For the rare legacy browser, use a <picture> element with a JPEG fallback.
<picture>
  <source srcset="/images/hero.webp" type="image/webp" />
  <img src="/images/hero.jpg" alt="Hero image" width="1200" height="630" />
</picture>
GIF — Only for Simple Animations
GIF is a legacy format limited to 256 colours with basic transparency and frame-based animation. For anything more than a simple looping graphic, it produces large files with poor quality compared to WebP.
Use GIF for: simple looping animations where WebP is not an option.
Replace with WebP for: all new animated images. Animated WebP files are typically 30–70% smaller than the equivalent GIF.
What Quality Setting Should You Use?
The quality slider (1–100) controls the trade-off between file size and visual quality for lossy compression. Higher values preserve more detail but produce larger files.
Quality 85–95: Near-lossless. Minimal reduction in file size. Use for images that will be printed or displayed very large.
Quality 75–85 (recommended): The sweet spot for web images. Produces 60–80% smaller files with no visible quality difference on screen at normal viewing sizes. This is the default for most image compression tools.
Quality 60–74: Noticeable reduction in file size, minor quality degradation on close inspection. Acceptable for thumbnails and background images.
Quality below 60: Visible JPEG artefacts — blocky patterns, soft edges, colour banding. Avoid for anything the user will look at directly.
For most web images, start at 80% and adjust based on the preview. Check the result at the actual display size — a 1200×630 image displayed at 600×315 on screen hides many compression artefacts that would be visible if you zoomed in.
How to Compress Images Without Losing Quality
The phrase "without losing quality" is sometimes used loosely. At 80% JPEG quality, you are technically losing some data — but the human eye cannot perceive the difference at normal screen viewing distances. What you are actually avoiding is visible quality loss: the blocky artefacts and blurriness that come from over-compression.
The key is matching compression level to image content:
- Photographs tolerate aggressive compression well — the natural variation in colours and textures masks compression artefacts
- Images with sharp edges (logos, text, line art) show artefacts more easily — use lossless PNG or WebP lossless
- Screenshots of interfaces often have large areas of flat colour that compress well losslessly — use PNG or WebP lossless
- Product images with transparent backgrounds need PNG or WebP to preserve the transparency
For photographs, quality 80 almost always produces visually identical results to the original. For sharp-edged graphics, lossless is the safer choice even if the file is larger.
How to Compress Images: Step-by-Step
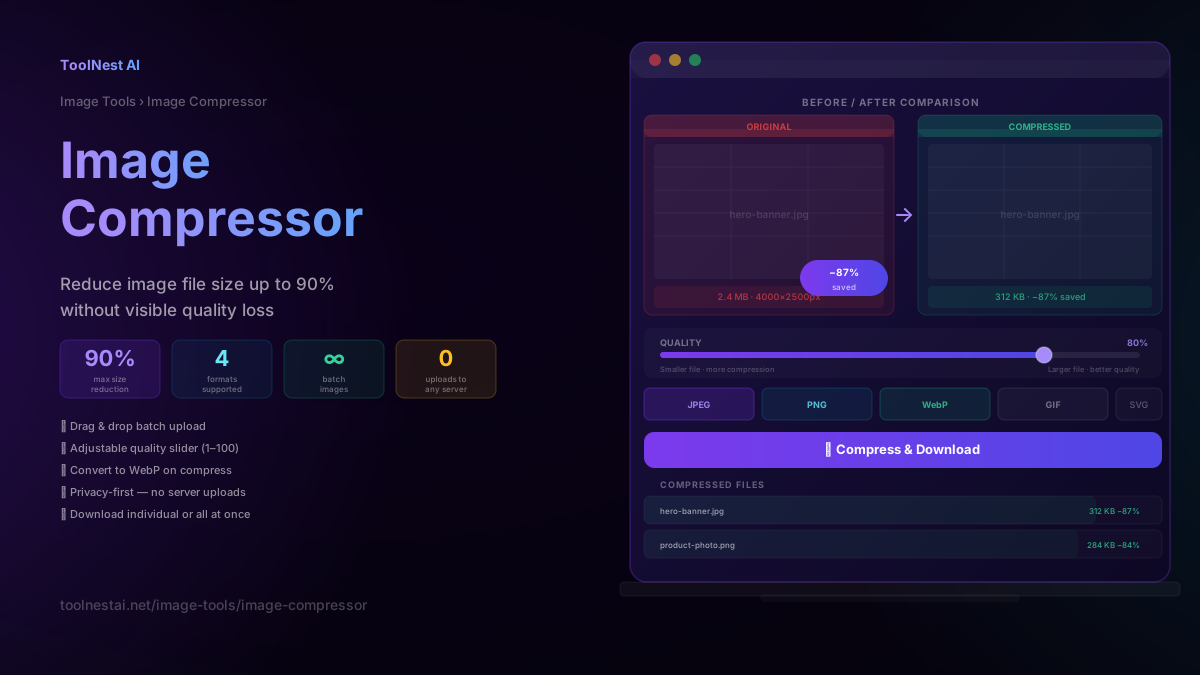
The ToolNest AI Image Compressor lets you compress any image — JPEG, PNG, WebP, or GIF — directly in your browser. No files are uploaded to a server. Processing happens locally, so your images stay private.
Step 1: Upload your images
Drag and drop images onto the upload area, or click to open a file picker. You can upload multiple images at once — batch compression is fully supported.
Step 2: Set the quality level
Use the quality slider to choose a compression level. For most photos and hero images, 80% is the best starting point. For logos and screenshots, you may prefer to keep quality higher or switch to lossless.
Step 3: Choose the output format
Select whether to keep the original format or convert to a different one. Converting JPEG images to WebP typically saves an additional 25–35% on top of the JPEG compression — the best option for modern sites.
Step 4: Compress
Click "Compress Images." The tool processes each file and displays the original size, compressed size, and percentage saved for each image.
Step 5: Download
Download individual files or click "Download All" to get a ZIP archive of all compressed images at once.
5 Common Image Compression Mistakes
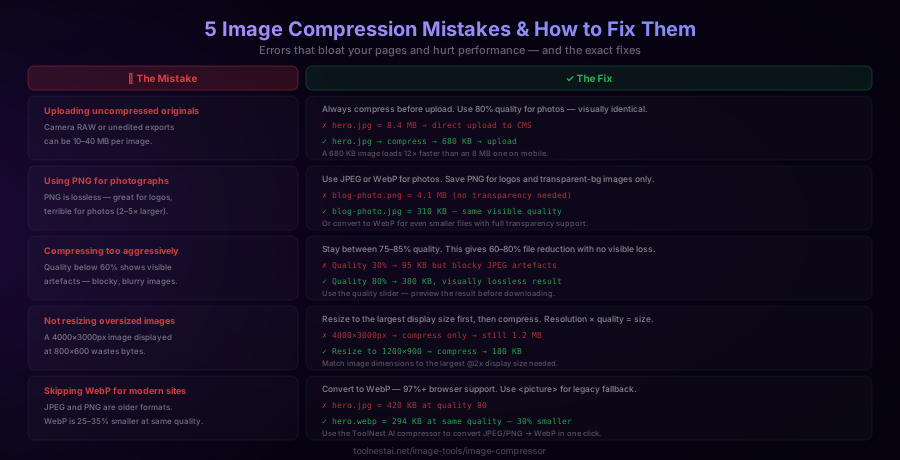
1. Uploading uncompressed originals directly to your CMS
Camera RAW exports and unedited high-resolution photos can be 10–40 MB per file. Uploading them directly to WordPress, Shopify, or any other CMS and relying on the CMS to resize is not enough — most CMS platforms resize but do not compress aggressively.
Always compress before uploading. A 680 KB compressed image loads 12× faster than an 8 MB original.
2. Using PNG for photographs
PNG is lossless, which sounds like it should produce the best results. For photographs, it produces the worst results — files 2–5× larger than JPEG with no visible quality improvement. PNG's lossless compression has nothing to work with in a photograph's continuous colour gradients.
Use JPEG or WebP for any photograph. Save PNG for logos and transparent images.
3. Compressing too aggressively
Quality below 60% starts producing visible artefacts in JPEG images — blocky squares in smooth areas, colour banding in gradients, and soft halos around edges. These are visible to users and make images look unprofessional.
The sweet spot is 75–85%. At quality 80, you get 60–80% file size reduction with zero visible quality loss on screen.
4. Not resizing oversized images before compressing
A 4000×3000px image displayed in a 800px wide blog column is wasting 25× the pixels that are actually shown on screen. Even after compression, it remains larger than necessary.
Resize to the maximum display size first — for a typical blog article, that is 1200–1600px wide at @2x for retina displays. Then compress. The combination of resizing and compression routinely achieves 90%+ file size reduction.
5. Not switching to WebP for new images
If your site already serves JPEG and PNG images, you do not need to convert everything immediately. But for new images, WebP is the clear choice. It gives you the same visual quality as JPEG at 25–35% smaller file size, plus transparency support and animation — with 97%+ browser coverage.
Use the ToolNest AI compressor to convert JPEG or PNG to WebP at the same time as compressing.
Image Compression and Core Web Vitals
Google's Core Web Vitals are the most direct connection between image optimisation and search ranking. Three metrics are affected by image size:
Largest Contentful Paint (LCP) measures how quickly the largest image or text block on the page becomes visible. The hero image is almost always the LCP element. Google's target is under 2.5 seconds. A compressed hero image that loads in 0.8 seconds instead of 4 seconds can move your LCP from "Poor" to "Good" in one change.
Cumulative Layout Shift (CLS) measures unexpected layout movement as the page loads. Images without explicit width and height attributes cause layout shift because the browser does not know how much space to reserve until the image loads. Always add dimensions:
<img src="hero.webp" alt="Hero image" width="1200" height="630" />Interaction to Next Paint (INP) is less directly affected by image size, but a heavy page that is busy downloading large images can delay JavaScript execution, which hurts INP.
Compressing images and adding explicit dimensions addresses two of the three Core Web Vitals directly. It is the highest-impact single optimisation available to most websites.
Image Compression for Different Platforms
Different platforms have different image requirements. Here is what to target for the most common use cases:
Blog hero images: 1200×630px, WebP at 80% quality, under 200 KB Product images (e-commerce): 800×800px for thumbnails, 1200×1200px for product detail, WebP at 85%, under 300 KB Social media open graph images: 1200×630px, JPEG or WebP, under 8 MB (Facebook), ideally under 500 KB Email images: 600px wide max, JPEG at 80%, WebP is not supported in most email clients Background images: Match the max display width, WebP at 70–75%, under 200 KB Icons and logos: PNG or WebP lossless, dimensions matched to display size @2x
Frequently Asked Questions
Does compressing an image reduce its quality?
At 75–85% quality, lossy compression removes image data that the human eye cannot perceive at normal screen viewing distances. The result looks identical to the original. At quality below 60%, compression artefacts become visible — blocky patterns and blurred edges. Use 80% as your default starting point and preview the result before downloading.
What is the best image format for websites?
WebP is the best format for modern websites. It produces files 25–35% smaller than equivalent JPEG at the same visual quality, supports full transparency, and is supported by 97%+ of browsers. Use PNG only for logos and transparent images where you need lossless quality. JPEG is a reliable fallback for email and legacy contexts where WebP is not supported.
How much can I reduce an image file size?
It depends on the image type, starting size, and quality setting. A high-resolution photograph at quality 80 typically achieves 60–80% reduction. Converting JPEG to WebP adds another 25–35% on top. Combined resize + compress + convert can achieve 90%+ reduction for large originals. Logos and PNG graphics typically see 20–40% reduction with lossless compression.
Is image compression safe? Do I lose the original?
The ToolNest AI Image Compressor processes images locally in your browser — nothing is uploaded to any server. Your original files are never modified. Download the compressed versions and keep the originals in your own storage. Always keep original high-resolution files before distributing compressed versions.
What is the best quality setting for compressing images?
75–85% is the sweet spot for most web images. Quality 80 is a reliable default: it produces 60–80% smaller files with no visible quality loss on a standard monitor at normal viewing distances. Use higher quality (85–95%) for images that will be viewed very large or printed. Avoid quality below 60% for images users will look at directly.
Can I compress multiple images at once?
Yes — the ToolNest AI Image Compressor supports batch uploads. Drag and drop as many images as you need, set a quality level that applies to all, and download them all at once using the "Download All" button. This is useful for compressing a full set of product images or blog thumbnails in one step.
Does image compression help with SEO?
Yes, indirectly and significantly. Compressed images load faster, which improves Core Web Vitals scores — particularly Largest Contentful Paint (LCP). Google uses LCP as a ranking signal. Faster pages also have lower bounce rates, which further supports rankings. Adding width and height attributes to compressed images prevents Cumulative Layout Shift (CLS), another Core Web Vitals metric.
What is the difference between lossy and lossless compression?
Lossy compression permanently removes image data to achieve smaller file sizes. The removed data is chosen to minimise visible impact, but the original cannot be perfectly reconstructed. JPEG and WebP (lossy mode) use this approach. Lossless compression reorganises data more efficiently without discarding any of it — the original can be perfectly reconstructed. PNG and WebP (lossless mode) use this approach. For web photographs, lossy at 80% is almost always better. For logos and UI graphics, lossless is safer.
About the author
ToolNest AI Team
The ToolNest AI team builds free tools that help developers, marketers, and creators do more online — faster.
Related Articles
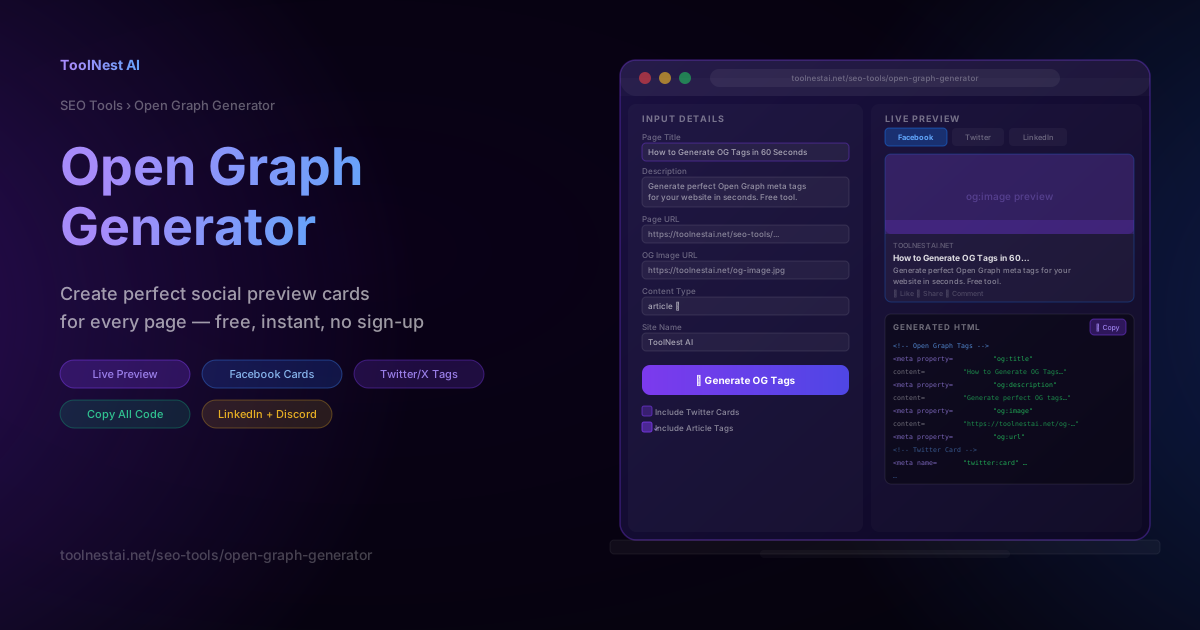
Open Graph Generator: Create Perfect Social Preview Cards Free
Learn how Open Graph tags work, which tags every page needs, and how to generate them instantly with a free OG generator. Includes live previews for Facebook, LinkedIn, Twitter/X, and Discord.
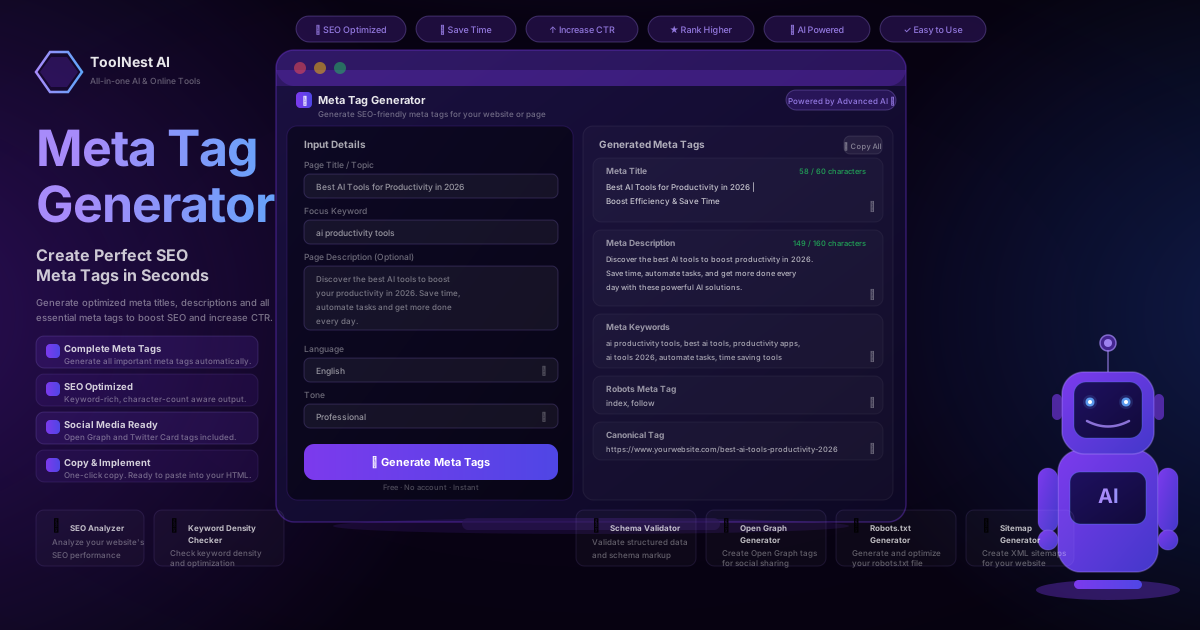
Meta Tag Generator: Create Perfect SEO Meta Tags (2026 Guide)
Learn how to use a meta tag generator to create perfect SEO meta tags — title, description, robots, canonical, Open Graph and Twitter Card — in under 10 seconds.